Building a low-cost soil moisture sensor for farmers involves creating an easy-to-use, affordable device that helps monitor soil conditions to optimize irrigation and improve crop yields. Here’s a step-by-step guide to designing and building a cost-effective soil moisture sensor:
1. Identify the Key Components
To measure soil moisture, you need a few basic components:
- Soil Moisture Sensor: The core component that detects the amount of water in the soil.
- Microcontroller: A small, low-cost processor to read the sensor data and possibly communicate with a display or an external system.
- Power Supply: A battery or solar panel to power the sensor and microcontroller.
- Data Display (Optional): A simple LED or small display to show moisture levels.
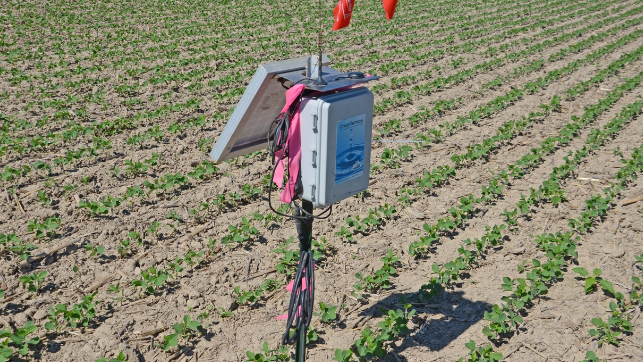
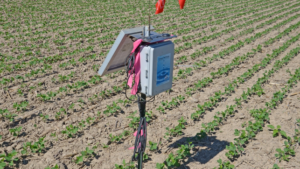
- Enclosure: A weatherproof casing to protect the electronics from soil and environmental exposure.
2. Choosing the Soil Moisture Sensor
There are different types of soil moisture sensors, each with pros and cons. The two main categories for low-cost sensors are:
- Resistive Sensors:
- How It Works: These sensors measure the electrical resistance between two electrodes. As the soil moisture increases, the resistance decreases.
- Advantages: Simple, inexpensive, and widely available.
- Disadvantages: Susceptible to corrosion over time, which can reduce lifespan.
- Capacitive Sensors:
- How It Works: These sensors measure the change in capacitance, which changes with the amount of water in the soil.
- Advantages: More durable than resistive sensors, less affected by corrosion, and can provide more accurate readings.
- Disadvantages: Typically slightly more expensive than resistive sensors.
3. Selecting the Microcontroller
The microcontroller processes the data from the sensor. Some low-cost and power-efficient options include:
- Arduino (e.g., Arduino Uno or Arduino Nano): Simple, open-source, and has plenty of community support.
- ESP8266/ESP32: These microcontrollers are affordable and have Wi-Fi capabilities, which allows for remote monitoring (optional).
- Raspberry Pi Pico: A low-cost microcontroller with a good balance of features and performance.
4. Power Supply Options
- Battery-Powered: Use a rechargeable or disposable battery (such as AA, AAA, or Li-ion batteries). Depending on the sensor’s power consumption, a rechargeable battery can last a long time.
- Solar Panel (Optional): If you’re building a more permanent, outdoor solution, integrating a small solar panel can provide continuous power, reducing the need for battery replacement.
5. Building the Circuit
The circuit needs to connect the soil moisture sensor to the microcontroller. Here’s a basic setup for a resistive soil moisture sensor:
- Connect the sensor’s two terminals to the analog input pins of the microcontroller.
- Power the microcontroller and sensor using the power supply.
- Use a resistor (optional) to improve the stability of the readings.
For capacitive sensors, the connections will be similar, but you may need to adjust the input and calibration for the sensor’s output.
6. Programming the Microcontroller
- Write a simple program to read the sensor data and output the moisture levels.
- Threshold Values: You’ll need to define a threshold value (moisture level) to indicate when the soil is dry or wet. For example, when the sensor reading is below a certain threshold, you can trigger a warning or an irrigation system.
- Calibration: Calibration is important to ensure that the readings are meaningful. This can be done by testing the sensor in soil with known moisture content and adjusting the program accordingly.
- Optional Communication: If you’re integrating with a smartphone or computer system, program the microcontroller to send data via Wi-Fi (ESP8266/ESP32) or Bluetooth.
7. Data Display (Optional)
- LED Indicator: You can use an LED to show the moisture level (e.g., a green LED for moist soil and red for dry soil).
- LCD or OLED Display: If you want more detailed information (e.g., numerical readings), you can add a small LCD or OLED display to show the moisture percentage.
- Mobile App or Web Dashboard: If you’re using an IoT approach with ESP8266/ESP32, you can send the data to a cloud service and view it via a mobile app or a web interface.
8. Enclosure and Durability
- Weatherproof Casing: To protect the electronics, use an enclosure that is weatherproof and suitable for outdoor conditions. Consider using IP65-rated enclosures, which provide good protection against water and dust.
- Sensor Placement: Ensure the sensor is placed at a depth where it can accurately reflect soil moisture levels (typically a few inches below the soil surface).
- Wiring Protection: Use weather-resistant wiring or coating to protect the wiring from moisture and soil exposure.
9. Testing and Calibration
- Test in Different Soil Types: Test your sensor in different soil types and moisture conditions to ensure accurate readings.
- Adjust Calibration: Fine-tune the threshold values and sensor behavior based on the type of soil and the local environment.
10. Cost Considerations
- Sensor Cost: Resistive sensors are typically cheaper (around $1-$5), while capacitive sensors may cost $5-$10.
- Microcontroller Cost: Basic Arduino boards cost about $3-$10, while more advanced microcontrollers like ESP32 cost $5-$15.
- Power Supply: Solar panels can cost $5-$15 depending on the size, and batteries are inexpensive, especially for short-term use.
11. Final Considerations
- Scalability: If you are targeting multiple farmers or large-scale farms, consider making the sensor scalable and easy to deploy in multiple areas, possibly integrating it into a broader irrigation system.
- Durability: Ensure that your sensors are durable enough to withstand long-term exposure to the soil and weather conditions.
- Maintenance: Provide guidance on sensor cleaning or recalibration to ensure long-lasting accuracy.
Conclusion
A low-cost soil moisture sensor for farmers can improve irrigation efficiency, reduce water waste, and enhance crop health. By focusing on affordability, ease of use, and reliable performance, this device can be a valuable tool for small and medium-scale farms. Would you like more help with specific parts of the design or code for your sensor?
Also Read :