Developing a Low-Cost Earthquake Detector for Schools
Creating a low-cost earthquake detector involves designing a simple yet effective device to sense seismic activity and alert school authorities and students. Such a system can enhance safety in earthquake-prone areas by providing early warnings to minimize injuries and chaos.
1. Objectives and Goals
- Primary Purpose: Provide an affordable, easy-to-use device that detects earthquakes and issues alerts in schools.
- Key Features:
- Detect ground motion caused by earthquakes.
- Trigger audible and visual alarms.
- Operate reliably without high maintenance costs.
- Target Audience: Schools in earthquake-prone areas.
2. Key Components
A. Sensing Unit
- Accelerometer: Detects ground motion by measuring changes in acceleration (e.g., ADXL345, MPU6050).
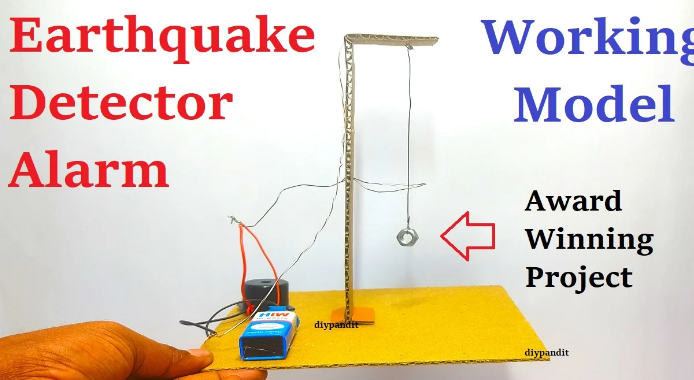
- Pendulum Switch (Mechanical Alternative): Uses a simple swinging weight to close a circuit during seismic motion.
B. Microcontroller
- Processes sensor signals and determines if motion exceeds the earthquake threshold.
- Examples:
- Arduino Nano or Uno (for simplicity).
- ESP32 (if Wi-Fi connectivity is needed for alerts).
C. Alarm System
- Audible Alarm: Buzzer or siren to alert students and staff.
- Visual Indicator: LED lights to signal different alert levels.
D. Power Supply
- Battery Pack: Ensures functionality during power outages.
- Optional: Solar panel for long-term sustainability.
E. Housing
- Durable and shock-resistant enclosure to protect components.
3. Design Features
- Threshold Detection: Configurable sensitivity based on regional seismic activity levels.
- Self-Test Mode: Ensures the device is operational and ready at all times.
- Scalability: Multiple detectors can be networked for larger campuses.
4. Steps to Build the Detector
A. Assembling the Hardware
- Connect the accelerometer or pendulum switch to the microcontroller.
- Attach the alarm system (buzzer and LEDs) to appropriate output pins.
- Install the power supply with a voltage regulator if necessary.
- Mount all components inside a weatherproof, shock-resistant enclosure.
B. Programming the Microcontroller
- Code for Motion Detection:
- Read data from the accelerometer or switch.
- Filter noise using software-based signal processing.
- Set a threshold for triggering alerts based on seismic intensity.
- Alarm Activation:
- Activate the buzzer and LEDs when motion exceeds the threshold.
- Optional Networking:
- Program the device to send notifications via Wi-Fi or SMS in larger systems.
C. Calibration and Testing
- Simulate seismic motion using a shaking table or other means.
- Adjust the sensitivity to differentiate between false triggers and actual seismic events.
- Test alarms for audibility and visibility in school environments.
5. Deployment
- Install devices in strategic locations across the school, such as classrooms, corridors, and assembly halls.
- Conduct drills to familiarize students and staff with the alarm system.
- Periodically test and maintain the detectors to ensure functionality.
6. Maintenance
- Replace batteries every 6–12 months or use rechargeable alternatives.
- Periodically clean and inspect the device for physical damage.
- Update the microcontroller firmware if needed to improve performance.
7. Cost Estimate
- Accelerometer: $5–$15.
- Microcontroller: $10–$20.
- Alarm System: $5–$10.
- Power Supply: $10–$20.
- Enclosure and Wiring: $10–$20.
- Total Cost: $40–$85 per unit.
8. Benefits of the System
- Safety: Provides early warnings, allowing students and staff to evacuate quickly.
- Cost-Effective: Affordable components make it accessible for schools with limited budgets.
- Educational Value: Demonstrates practical applications of science and engineering.
9. Limitations
- May not detect small tremors accurately without advanced sensors.
- Could trigger false alarms due to vibrations from non-seismic sources.
- Requires periodic calibration for optimal performance.
10. Example Use Case
- Scenario: A school in an earthquake-prone region installs 10 detectors across classrooms and common areas. During an earthquake, the detectors activate alarms, prompting safe evacuation procedures.
- Outcome: Enhanced preparedness and reduced panic during seismic events.
Would you like detailed instructions for programming the microcontroller, designing the enclosure, or implementing advanced features like remote alerts?

Also Read :
- Developing a Solar-Powered Charging Station for Rural Areas
- Developing a Low-Cost Prosthetic Hand for Amputees
- Developing an Eco-Friendly Concrete Mix Using Recycled Materials
- Neurosurgery in Developing Countries: Challenges and Opportunities
- Bridging the Gap: Engineering Research in Affordable Housing
